How To Pre-Cart on Shopify and Check Out Quickly

With the Nike React element 87 release fast approaching, I thought this was a good time to provide everyone with a guide on how to improve your check out speed on Shopify and improve your chances of purchasing successfully.

This has been my tried and true method on all Shopify based websites for years now. While it has become harder to succeed online thanks to bots, this method does increase your chances as it only requires you to do 4 steps from adding to cart to purchasing. A normal check out process without this method can be over 10 steps/clicks long.

Some important things to know before reading this guide

  • It’s assumed you understand the basic of the shopify check out process
  • Having autofill enabled when shopping online is an absolutely crucial feature to have. Your addresses and credit cards being stored and ready to fill a page in one click are mandatory to a successful online purchase.
  • This guide is done in Chrome, which is my preferred browser of choice
  • If you don’t have a google account of some kind (ex. GMAIL) its highly recommended you create one. This too will save you time and we’ll explain why later in this guide.
  • Having an account created on the current shopify website with addresses pre-saved is highly recommend.
  • For the purpose of this guide we will use Livestock’s website (www.deadstock.ca) as the example. This guide applies to any site that uses shopify.
  • These same steps can be done on mobile but will prove to be more difficult because of constraints of mobile devices. We always recommend a desktop/laptop computer.
  • I do not recommend using incognito tabs for this type of release.

Step 1: Adding a Product to Your Pre-Cart

The number one thing to remember to this guide and the “Pre-Cart” process is that you are essentially doing what you would normally do if you wanted to purchase a shoe. So you will see the first portion of this guide is very straight forward.

First you need to find a product on the the Shopify website you that you would like to use as your dummy purchase. It’s important that the product you choose is a similar price to the one releasing. The reason for this is, some website’s offer free shipping over $X spent.

Haven for example only offers free shipping over $300.  If you pre-cart a $320 product, it would qualify for free shipping. If the product you plan to buy is $255, then later on your pre-cart would be reset because you would need to choose a paid shipping option or in-store pick up. If this happens, it’s likely going to cause you to miss out on the product you want.

Once you have your product selected. Pick any size to add to cart, and then add that product to your cart.

Step 2: Proceed to Your Cart

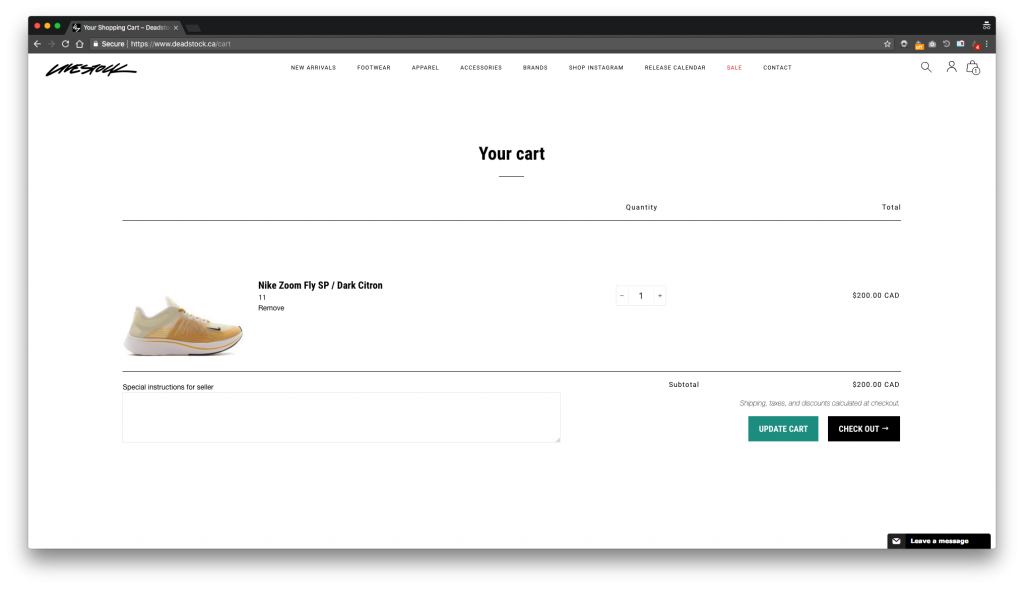
Once you’ve added your product to cart you will be promoted with some kind of method to view your cart. In this case the Livestock website slides the cart from the right with the option to “View Cart” at the bottom right.

You will find most websites have a cart link somewhere in the top right of the screen.

Step 3: Proceed to Check Out

Take note some website’s require to to agree to Terms & Conditions to continue from this step.

Step 4: Fill Out Your Shipping Information

Like I said, we’re keeping things simple here for the start. Fill out your shipping information like you normally would.

Take note, it is HIGHLY recommend that your shipping address is also your billing address. Different ship/bill addresses can cause Fraud alerts in Shopify systems and sometimes cancellations. On top of that, it will also slow you down at check out if you have to use a different billing address.

Step 5: Captcha


Some websites will add a captcha requirement right before release, that’s why it’s important to do this pre-cart check out about 5 minutes before release.

Also equally as important is that you are logged into a Google account of some kind (ex. GMAIL) in the same browser you plan to purchase the product. This will usually lead to you having to not do Captcha at all (one click verification) or answer a simple test (minimal clicks). This is because Captcha is owned by Google and they use your logged in cookie data to verify your account and that you are nota bot.

Doing this pre-cart should usually not require you to do captcha again, but if it does, being logged into your Google account will speed up the process.

Step 6: Pick Your Shipping Method

When it comes to selecting your shipping method it is very important to keep in mind a few variables. Livestock for example charges shipping on high heat releases even if they qualify for free shipping. This means that if you were trying to purchase a Yeezy online, you should decide now do you want to pick it up in-store, or pay for shipping? For high heat releases on websites like Livestock DO NOT pick free shipping. It will reset your pre-cart later on and be a costly mistake.

For the React element 87 release this week, Livestock will only allow in-store pick up. So for this release you NEED to select the in-store pick up location you want to visit to get your shoes.

When you’ve selected the proper shipping method, click on “Continue to payment method”.

Step 7: STOP! This is Where It Gets Tricky


Now it’s time for the fun. To this point you have basically done everything you would do if you wanted to purchase a shoe normally. This is why I call it a “Pre-Cart”.

YOU JUST PREPARED YOUR CART AND THE SITE FOR THE REAL PURCHASE.

At this point, you are four major steps into the check out process (Cart > Customer Information > Shipping Method > Payment Method).

DO NOT FILL IN YOUR BILLING INFORMATION. 

What you do next is OPEN A NEW TAB.

Step 8: Open a New Tab and Go to Your Cart

At this point what you need to do is OPEN A NEW TAB (do not close the current one) and in this new tab you need to CLEAR your cart and remove the product you have been using to Pre-Cart. Your Cart at this step should now be empty and contain no products.

At this point you should have two tabs open. One with your previous check out page and now one with the empty cart.

At no point should you close the tab that previously had your check out open. If you closed it by mistake, please start this guide over again and leave the tab open.

Step 9: In The Same Tab, Prepare To Purchase The Real Product

Now, in the example of this weeks React Element 87 release, Livestock will be providing an early link to everyone so you will know what page to go to. If you did not know what page to be on, I usually recommend “New Arrivals” or the brand category on that site (ex. Nike).

Since you know the direct link to the product, you can copy/paste that link into the current tab (the one you just emptied your cart in).

Step 10: Add The Product You Want to Cart

Once you have found the product you really want to purchase, you can add that product to your cart. Sometimes website’s have a “Quick add to cart” on New Arrivals pages that saves you from having to go to the product page. Use this to your advantage if you don’t have an early link to the product.

Step 11: Return to the Previous Checkout Tab You Left Open and REFRESH


TADA! Now that you have refreshed the product you used to pre-cart is gone and and the real product that just released has been added to cart and is ready for payment. Instead of doing the complete check out process you are now at the payment screen and have skipped all the previous steps.

At this point all you need to do is auto-fill your credit card and type in the security digits (CVV field). I usually have my credit card security digits ready in my clipboard (I previously typed it and copied it) and now I can quickly paste it into the field. Every little step that can save you time counts.

Once you are ready you can hit COMPLETE ORDER.

Trouble Shooting The Final Steps

  • Can you use Paypal? You can but it will slow you down greatly. If you insist on using paypal we highly recommend logging into paypal about 5 minutes prior and making sure your default payment method and shipping address are correct so that you don’t have to select those items at checkout.
  • Why didn’t I do my payment information in advance? Because this information does not save itself so there is no point to do it ahead of time.
  • What if I have to do Captcha again? If this happens it’s not the end of the world. Your shipping information will still be saved. You are hopefully logged into your Google account in the same browser and it will only require a single click to verify you are not a bot. After you do this, it should take you to check out again and skip the shipping method page.
  • What if I need to use a different billing address when I pay? We recommend having an account to that Shopify store and being logged in so that you can use a pre-saved address for your billing address. Autofill would also work in this case.